Monday, November 4, 2019
Recipe: Char Siu Pork (no red food coloring!)
No intro needed - here's my Char Siu pork recipe.
Ingredients
3 lb pork shoulder or pork butt (anything else will just be too dry)
1/2 cup ketchup (this is how we get the pork red without red food coloring)
1/4 cup mirin (sue me - I didn't use Chinese Shaoxing wine)
1/4 cup honey
1/4 cup hoisin sauce
1/4 cup brown sugar
2 tbsp soy sauce
2 tbsp oyster sauce
2 tsp of Chinese 5 spice
1 tbsp of minced garlic
1 tsp sesame oil
Directions
1. Combine all ingredients and let sit for the ingredients to "marry"
2. Slice the pork into 3 long strips
3. In a large ziplock bag or a flat dish, pour the marinade over the pork
4. Marinate overnight but I usually marinate for 2-3 days
5. Preheat oven to 350 degrees. (I ALWAYS default to a convection oven setting)
6. Line a sheet pan with aluminum foil. Place a metal rack on top of the sheet pan. Pour water onto the sheet pan but make sure it is below the metal rack.
7. Heat in oven for 20 minutes. Flip the pork for another 20 minutes in the oven.
8. While the pork is in the oven, heat the marinade in a sauce pan until it thickens. Set aside.
9. Remove the pork from the oven and turn on the broiler.
10. Baste the pork and put under the broiler until the edges are charred/crisp to your desire.
Let rest before slicing and serving. Can be paired with rice, noodles, or in a Vietnamese Banh Mi sandwich.
Bon appetit!
Wednesday, October 30, 2019
Recipe: Lemon Garlic Shrimp
Inspired by the shrimp trucks we sampled in Maui when we last visited paradise in 2017, here's my own take of lemon garlic shrimp. (Note: The shrimp trucks in Hawaii normally serve this plate with a scoop of coleslaw as well. Anybody who knows me knows I hate vegetables so....)
Ingredients
12 LARGE shrimp per person
3/4 cup all purpose flour
2 tbsp minced garlic
1 tbsp butter
1 tbsp olive oil
1/2 - 3/4 cup shrimp stock (chicken stock will do)
NOTE: I make my own shrimp stock
garlic salt
black pepper
cayenne pepper
Juice of half a lemon
Instructions
1. Season the shrimp with garlic salt, pepper, and as much cayenne pepper as you can handle.
2. Heat the olive oil and butter
3. Coat the shrimp in the flour and shake off excess flour.
4. Sear both sides of the shrimp but leave them slightly undone.
5. Add the shrimp stock and lemon juice.
6. Add 1 tbsp of the flour to the stock. The sauce should thicken.
Serve with a scoop of rice, a scoop of mac n cheese, and a scoop of cole slaw for an authentic Hawaiian shrimp truck feel.
Tuesday, October 29, 2019
Recipe: Tuna Poke
I've tried making poke a number of times with varying ingredients and amounts of each ingredients. I literally swapped out the honey for brown sugar this time around and it delivered! In fact, the boyfriend said it was his favorite poke I've made. That can ONLY mean I need to share the recipe!
Ingredients
1/2 lb sushi grade tuna, cubed
1/3 cup Japanese soy sauce
3 tablespoon sesame oil
1 tablespoon rice vinegar
2 tablespoon brown sugar
1/2 teaspoon Himalayan pink salt
Garnish:
cubed avocado
cubed crisp mango
tobiko
pokekake
Directions
1. Combine all marinade ingredients and let the marinade "marry" for a couple of minutes.
2. Pour the marinade over the tuna.
3. Top some white rice the cubed avocado and mango.
4. Next, top with the tuna sashimi.
5. Garnish with pokekake and tobiko
Bon appetit!
Tuesday, June 12, 2018
Recipe: Chicken Pho Salad
There's nothing like creating a recipe when you clear out your fridge! This past weekend, I had pho broth, pho noodles, leftover rotisserie chicken, a cucumber, and mint leaves in the fridge. Unfortunately, Southern California started to heat up this weekend so I was not in the mood to eat a hot soup. I always associate cucumbers with a refreshing salad....so why not make a pho salad?
The Vietnamese have a dry egg noodle dish where broth is served on the side. It's served with a smorgasbord of protein such as ground pork, bbq pork, shrimp, chicken etc. It's "dressed" with a soy sauce based dressing. This dry Vietnamese pho salad takes on a similar concept. I was quite pleased with the end result as well as quite relieved because I was too lazy to leave the house.
As usual, I eyeballed all of the ingredients so this is as best as I can remember
Ingredients for the Vinaigrette
1/2 cup of pho broth
2 tbsp honey
2 tbsp rice vinegar
1 tbsp sesame oil
1 tsp minced garlic
3 tbsp soy sauce
white pepper
Ingredients for the salad
pho noodles (as much as you desire)
1/3 of a cucumber - ran through a mandoline for thin even slices
fried shallots for garnish
roasted peanuts for garnish
sliced red chili peppers for garnish
mint leaves for garnish
1/2 - 1 cup of shredded chicken
Directions
1. Cook the pho noodles per package instructions. Drain and set aside
2. Combine the vinaigrette ingredients. Warm the sauce so that the honey is completely melted and mixed with the vinaigrette
3. Plate the cucumber slices in a circle on the plate
4. Add the pho noodles in a pile over the cucumber slices
5. Add the shredded chicken
6. Add the peanuts, mint leaves, fried shallots, and sliced red chili peppers to garnish
7. Drizzle the sauce over the deliciousness.
Bon appetite!
Monday, June 11, 2018
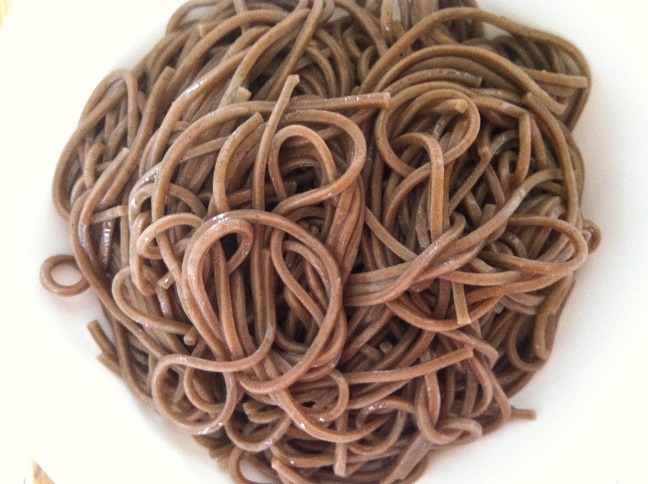
Recipe: Sesame Soba Noodles
Soba noodles - an underrated Japanese noodle that doesn't get enough love. Made from buckwheat, soba noodles can be served hot, cold, dry, or in a soup. Even better, soba noodles have great health benefits. It contains all 8 essential amino acids, Thiamine (aka vitamin B complex), manganese (supports your nervous system, bone health, glucose metabolism), protein, fiber, free of gluten if it's made from pure buckwheat, and low in fat!
Ingredients
3 tbsp sesame oil
2 tbsp honey
1 tbsp mirin
1 tbsp Maggi Sauce
2 tbsp tamari or soy sauce
1 tsp Lee Kum Kee Satay Sauce
Directions
1. Cook soba noodles according to package direction. Drain and rinse with cold water.
2. Mix all of the above ingredients together. Warm the sauce mixture to ensure the honey dissolves.
3. Toss the sauce and soba noodles.
Throw julienned carrots, edamame, tofu, or any other protein and you can make this into a filling meal.
Bon appetite!
Monday, March 19, 2018
Recipe: Chicken Piccata
I was never much into Chicken Piccata. This is likely due to restaurants making this dish too tangy for my taste. This past year, my boyfriend asked that I make this for him. The beauty in being a home cook is that you can control the taste of a dish to your liking. This is one of my go to dinner entrees now since the boyfriend loves it. Without further ado, here is my less tangy version of Chicken Piccata.
Ingredients
2 chicken breasts, butterflies
1 cup low sodium chicken broth
Juice of half a lemon...
2 tbsp olive oil
1 tbsp unsalted butter
4 tbsp all purpose flower
Garlic salt
Handful of capers
lemon slices for garnish
Directions
1. Butterfly the chicken breasts so that you have 4 equal halves
2. Season the chicken with garlic salt.
3. Dredge the chicken in the all purpose flour and shake off the excess.
4. In a medium high skillet, melt the butter and olive oil.
5. Add two pieces of chicken to the pan and brown both sides. Remove and let rest on a plate. Add the other two pieces of chicken and brown both sides. Remove from pan and rest on the same plate as the other two pieces.
6. Add the stock, capers, and lemon juice to the pan. Scrape the brown bits.
7. Add all 4 pieces of chicken to the pan and simmer. If you desire a thicker sauce, you can add in a half teaspoon of the leftover flour from the dredge.
Serve with pasta or rice. Drizzle the sauce over the chicken and garnish with lemon slices.
Bon appetite!
2. Season the chicken with garlic salt.
3. Dredge the chicken in the all purpose flour and shake off the excess.
4. In a medium high skillet, melt the butter and olive oil.
5. Add two pieces of chicken to the pan and brown both sides. Remove and let rest on a plate. Add the other two pieces of chicken and brown both sides. Remove from pan and rest on the same plate as the other two pieces.
6. Add the stock, capers, and lemon juice to the pan. Scrape the brown bits.
7. Add all 4 pieces of chicken to the pan and simmer. If you desire a thicker sauce, you can add in a half teaspoon of the leftover flour from the dredge.
Serve with pasta or rice. Drizzle the sauce over the chicken and garnish with lemon slices.
Bon appetite!
Monday, November 20, 2017
Recipe: Ca Nuong Da Don aka Vietnamese Roasted Catfish
One of my boyfriend's favorite Vietnamese entrees is Ca Nuong Da Don aka Roasted Catfish. Any of my friends know I've been making this numerous times over the past few months to try different techniques to perfect a crispy skin. After consulting other home cooks and foodies about their experiences, I'm now convinced the restaurants flash fry the catfish to get that perfectly crisp and oh so delectable Catfish skin that I love munching on.
A few tips:
1. You need a broiler oven that actually has a flame aka a gas oven broiler. A high heat broiler aka electric broiler just doesn't do the job.
2. Catfish skin is already oily as is - a wet marinade will not help with obtaining a crispy skin. Salt (or garlic salt) and pepper will suffice with seasoning.
3. Get a rack like the one pictured above when you roast.
4. Cleaning the black skin of the catfish so that it becomes white is hard. You can dunk the catfish into hot water real quick and then scrub it down with a brillo pad, but I suggest just asking the fish mongerer to do that cleaning for you. It saves much time, energy, and in my case, a complaining boyfriend 😆
The Fish
1. Preheat oven to 375 degrees.
2. Wash and clean the catfish and then thoroughly dry out the catfish. This helps to crisp up the skin.
3. Depending on how big the fish is, using the juice of 1-2 lemons, drenched the fish skin with the lemon and let it sit for 5 minutes. Repeat drenching the fish skin and let it sit for another 5 minutes.
4. Dry off the catfish again.
5. Score shallow slits alongside the body of the fish. Season with garlic salt and pepper.
6. Line a roasting pan or baking sheet with aluminum foil. Place fish right side up on top of a rack.
7. Bake in the oven until the fish turns golden brown.
Scallion Oil - No roasted cat fish would be complete without scallion oil to drizzle over. I usually just eyeball this so bear with me on the guestimate
1. Dice 3 bunches of scallions.
2. Heat 1/3 cup of canola oil until smoking. Turn off the heat.
3. Add in the scallion.
4. Add half a teaspoon of salt and 1/4 teaspoon sugar and stir to mix.
The Finish
1. Remove fish from oven when fish is golden brown. Turn on the broiler
2. Wait for the oven to notify you when the broiler is ready.
3. Brush the fish with plenty of honey to coat and immediately return the fish back into the broiler. WATCH THE FISH so it doesn't burn! When it reaches a dark crispy skin, remove the fish from the oven.
4. Garnish with the scallion oil and crushed roasted peanuts (I don't always garnish with peanuts but the scallion oil is a must for me).
Traditionally, this dish is served spring roll style with fresh vegetables and dipped in mam me aka Tamarind dipping sauce.
Bon appetite!
Tuesday, February 7, 2017
Recipe: Seared Scallops
I made seared scallops over the weekend and it was a hit
with my audience. A few of my friends
have asked how to get a great sear so here it is:
- Layer 3 paper towels.
- Place scallops on top of the towels. Sprinkle with salt. (I use Himalayan pink salt).
- Let the scallops sit for 25 minutes. The towel and the salt will get rid of the excess water from the scallops. You want the surface of the scallops to be dry to get that nice seared crust.
- Heat 1 – 2 tbsp of olive oil and 1 tbsp of butter in a sauce pan.
- In a clock wise direction, place the scallops starting at 12 o’clock around the edge of the sauce pan. I use this “clock” method as borrowed from Food Network Chef Anne Burrell as it helps to keep track of which scallops got seared first.
- Let sear for 1 – 1 ½ minutes and then flip the scallops using the clock method.
- Serve.
Monday, May 25, 2015
Recipe: Carne Asada Marinade
In observance of Memorial Day and the BBQ's galore, here is my recipe for carne asada. This recipe is made to serve 2 so increase the amount for ingredients as appropriate.
Ingredients:
1 lb beef flank
Juice from half of an orange
Juice from 1 lemon
1/8 cup of soy sauce
2 tbsp honey
1 tbsp of chili powder
handful of cilantro
1 tbsp of minced garlic
1 tbsp fresh oregano
1 tbsp cumin
1 small onion, sliced (I had some scallions that I used alternatively)
Directions
1. Combine all ingredients in a mixing bowl. Thoroughly mix.
2. Let marinade sit for 10 minutes so that ingredients "marry."
3. Score the flank steak across the grain. This helps the marinade to absorb into the meat.
4. Place the meat into a sealable plastic bag. Pour the marinade into the bag. Massage the meat with the marinade.
5. Marinade the meat for at least 4 hours. Overnight is best.
6. Grill to medium rare. Let the meat rest with a tent foil before slicing into the beef.
Bon appetit!
Sunday, May 3, 2015
Recipe: Chili
One pot meals are the best. They're easy, quick, and the clean up is a cinch. It was recently gloomy in Southern California, which is the perfect weather for something stewy like chili. I made do with what I had in the pantry. Bon appetit
Ingredients
1.5 lbs of ground beef/pork/turkey (your choosing)
4 oz of tomato paste
2 - 8 oz cans of diced fire roasted tomatoes
1 - 8 oz can of kidney beans
1 - 8 oz can of corn
1 large shallot, diced
5 diced garlic
1/4 cup fish sauce
1 tbsp maggi sauce
1 tbsp maggi sauce
4 tbsp honey
2 tbsp of cocoa powder
1 tbsp cumin
1 tsp smoked paprika
1 tsp oregano
Chicken stock
Chicken stock
1. In a Dutch oven, heat 2 tbsp of olive oil. Sweat the onion and garlic.
2. Add the ground protein and brown.
3. Add the diced tomatoes, tomato paste, and chicken stock.
4. Add the cocoa powder, cumin, smoked paprika, oregano, and kidney beans.
5. Simmer for 1.5 hours.
6. Add the honey, fish sauce, and maggi sauce. ADJUST TO TASTE.
Top with shredded cheddar cheese and sour cream.
Tuesday, December 23, 2014
Recipe: Hoisin BBQ Chicken Wings
As I've stated in a previous blog post: I love chicken wings. I love them every which way cooked. I came home from a long day of work to a package of chicken in the refrigerator and the below ingredients in my pantry. This is the result of beggars not being choosers.
Anyone who knows me knows I prefer to eat healthy food that doesn't compromise in flavor. With this recipe, you will be able to enjoy crispy chicken wings that make you feel like you're eating fried chicken without the unhealthy aspect of actual frying. Many thanks to Chef Ellie Krieger for this healthy "fried" chicken alternative.
Hoisin BBQ Sauce
1/4 cup ketchup
1/8 cup hoisin sauce
1 tsp caramel sauce
1 tsp rice vinegar
1 tsp minced garlic
1.5 tsp fish sauce
1. Combine all of the above ingredients. Thoroughly mix and adjust to taste.
Chicken prep (1-2 pounds of chicken wings, split at joint)
1. Place chicken into a huge pot and fill with water to cover all of the chicken.
2. Bring to a boil and continue boiling for 10 minutes. Drain.
3. Place chicken under the broiler oven until the chicken skin starts to blister and crisp up.
You can stop here if you prefer to dip your chicken wings into the bbq sauce. However, if you want the sauce on the chicken...
4. Mix the chicken wings with the bbq sauce. Place chicken back under the broiler for 1 more minute.
Bon appetite!
Wednesday, August 27, 2014
Recipe: Cioppino
A few years ago while I was in San Francisco, I tried cioppino for the first time. It was amazing! I was on a tomato kick at that time and anything with a tomato base or note had me hooked. Naturally, I had to recreate the dish at home, but I had some willing guinea pigs to help me devour the entire lot!
Equipment
Stock pot or dutch oven
Ingredients
3 tbsp olive oil
1 shallot, chopped
1 onion, chopped
5-6 garlic cloves
3 tbsp tomato paste
2 bay leaves
3 tbsp fish sauce
1 - 28oz can of diced tomatoes
8 cups shrimp stock (thank you Insatiably Epicurious for this)
1 cup dry white wine
1 tsp red pepper flakes
1 lb of shrimp
1 lb of scallops
1 lb of green mussels
1 lb of manila clams
1 lb of firm-fleshed fish fillets (sea bass, halibut, salmon) cut into 2 inch chunks
Lemon zest
Chopped parsley
Directions
1. In a large stock pot or dutch oven, heat the olive oil over a medium heat. Add the chopped shallot, onion, and fish sauce. Saute until
2. Add the garlic and red pepper flakes. Saute for about a minute.
3. Add the tomato paste and stir until it is evenly coated over the shallot, onion, and garlic.
4. Add the can of diced tomatoes, including its juices. Stir for about a minute
5. Add the wine, shrimp stock, and bay leaves. Cover and simmer for 40 minutes.
6. Add the clams and mussels. Cover and cook about 5 minutes until the clams and mussels begin to open.
7. Add the shrimp and fish and simmer for another 5 minutes. At this point, discard any clams and mussels that did not open.
8. Season the soup to taste using fish sauce and or red pepper flakes.
9. Garnish with lemon zest and chopped parsley.
Bon appetit!
Sunday, August 24, 2014
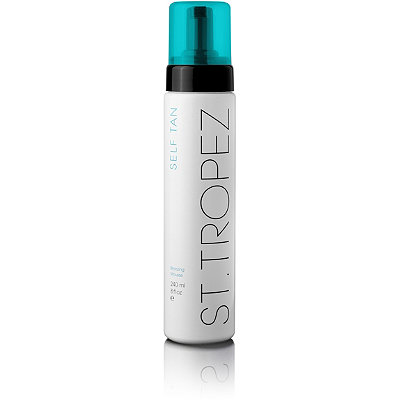
Review: St Tropez Self Tan Bronzing Mousse
So this post may come a tad bit too late since summer is officially suppose to end soon. However, those of us who live in CA know that summer won't end for quite some time. This means tank tops, flip flops, shorts, skirts, rompers, bikinis....basically anything that shows skin... will continue dominating our daily wear. For me, this means my pasty pale legs continue to blind everyone around me. I'm one of those unfortunate people who just can't seem to tan.
My solution? St. Tropez Self Tan Bronzing Mousse. I've been using this self tanner since December of 2013 (a good 9 months now) and absolutely recommend it. It gives an extremely natural tanned look to the skin, is easy to apply, and doesn't leave you with a self tanner smell.
Winner of award from the Best of Beauty Allure Award, InStyle Best Beauty Buys, Bridal Beauty Awards, Cosmopolitan Beauty, Cosmo Girl, Debenhams, Choice Awards, Pure Beauty, and Elle Beauty Awards, just to name a few.
Prep work
For newbies or first time self tanners, it's extremely important to prep your skin before applying self tanner. In order for the self tanner to "glue" or "cling" to your skin, your skin must be prepped properly. Think of self tanner for your body as the foundation you apply to your face. If the skin on your face is flaky, your foundation will apply unevenly and will appear flaky. This same concept applies to your body. Thus, it is extremely important to exfoliate, exfoliate, exfoliate! Get rid of those dead skin cells. I like to prep my skin by using a body scrub in the shower. I currently use a salt scrub, but any brand will do so long as it gets the job done.
Application
The bottle itself is a pump that expels a brown colored mousse. St. Tropez has a mitt that is sold separately that you use in order to apply the tanning mousse over your body. The St. Tropez mitt costs $6.50. ULTA also sells a tanning mitt for $5.99 (BOGO 50% off right now actually) and is an exact dupe of the St. Tropez mitt. Pump the mousse out onto the mitt and then use the mitt to apply all over your body. That's IT. I apply this right after I shower and then go about my nightly routine. It doesn't transfer to my clothes or my bedding.
Simple. Easy. Not messy. Love it.
A gal pal of mine remarked one day that she liked my tan. When I told her it was the result of a self tanner, she was completely surprised. I'd like to think that speaks volumes as to the natural look this product achieves.
At $42 for an 8 oz bottle, this is a pretty decently priced product. I usually wait for the 20% coupon from ULTA or the Beauty Insider coupons from Sephora to pick this product up. It lasts quite a while.
Verdict: A+ for affordability, natural look, and ease of use
Monday, June 16, 2014
Makeup for Ira
I had the opportunity to do makeup for one of the most easy going brides a few weeks ago while I was in Indonesia. You HAVE to love a girl who starts off her wedding day by eating a huge tiramisu cake for breakfast. Fabulous much?? After filling her tummy with tiramisu and some Indonesian noodles, the bride was ready to get her makeup done. Ira opted for pink lips for the ceremony...
....and then red lips for the reception
A few more pictures from the big day:
Eyes
LORAC Behind the Scenes Eye Primer
MAC e/s in Soft Brown
Makeup Geek e/s in Creme Brûlée
MAC e/s in Honey Lust
MAC e/s in Ground Brown
MAC e/s in Sketch
MAC e/s in Mylar
Makeup Geek e/s in Corrupt
Inglot Gel Eyeliner in #77
False Lashes
Ardell - Demi Wispies
Eyebrows
Make Up For Ever Aqua Brow Gel - #15
Cheeks
Contour - MAC Powder Blush in Harmony
Blush - MAC Powder Blush in Peaches
Highlight - theBalm Cosmetics Mary Lou Manizer
Lips
MAC Lipliner in Dervish
MAC Lipstick in Angel (for the ceremony)
MAC Lipstick in Viva Glam (for the reception)
Setting Spray
Motives 10 Years Younger Makeup Setting Spray
....and then red lips for the reception
A few more pictures from the big day:
Here are the details of Ira's makeup:
Face
Smashbox Photo Finish Foundation Primer
Giorgio Armani Luminous Silk Foundation in 7
MAC Pro Longwear Concealer in NW30
MAC Prep and Prime Color Correcting Powder
Eyes
LORAC Behind the Scenes Eye Primer
MAC e/s in Soft Brown
Makeup Geek e/s in Creme Brûlée
MAC e/s in Honey Lust
MAC e/s in Ground Brown
MAC e/s in Sketch
MAC e/s in Mylar
Makeup Geek e/s in Corrupt
Inglot Gel Eyeliner in #77
False Lashes
Ardell - Demi Wispies
Eyebrows
Make Up For Ever Aqua Brow Gel - #15
Cheeks
Contour - MAC Powder Blush in Harmony
Blush - MAC Powder Blush in Peaches
Highlight - theBalm Cosmetics Mary Lou Manizer
Lips
MAC Lipliner in Dervish
MAC Lipstick in Angel (for the ceremony)
MAC Lipstick in Viva Glam (for the reception)
Setting Spray
Motives 10 Years Younger Makeup Setting Spray
Sunday, June 8, 2014
Makeup for Shirley
As I was going through the drafts portion of my blog to see which posts I need to finish, I was shocked to find that I never published the makeup I did for Shirley on her wedding day. Mea Culpa to me for such oversight! Without further ado then!
By the time I was almost done applying foundation and concealer to her face, I remembered I hadn't yet taken a before picture.
If any bride can rock leopard print on her Big Day in a stylish yet feminine way, it'd be Shirley. This Cross Fit Merge superstar agreed to marry her sweetheart of 18 years when he popped the question in Italy! Tres romantique, oui?
Face
Smashbox Photo Finish Foundation Primer
Make Up For Ever Matte Velvet Plus
BareMinerals Mineral Veil
Eyes
MAC paint pot in Painterly
MAC eyeshadow in Woodwinked
Urban Decay eyeshadow in Blackout
MAC eyeshadow in Mylar
MAC fluidline in Blacktrack
MAC eyeshadow in Soft Brown
Eyebrows
Make Up For Ever Aqua Brows in 25
Cheeks
Benefit Hoola
NARS blush in Orgasm
Sleek contour in medium for highlight
Lips
MAC Lipliner in Plum
MAC Lipstick in Creme de la Femme
Monday, April 21, 2014
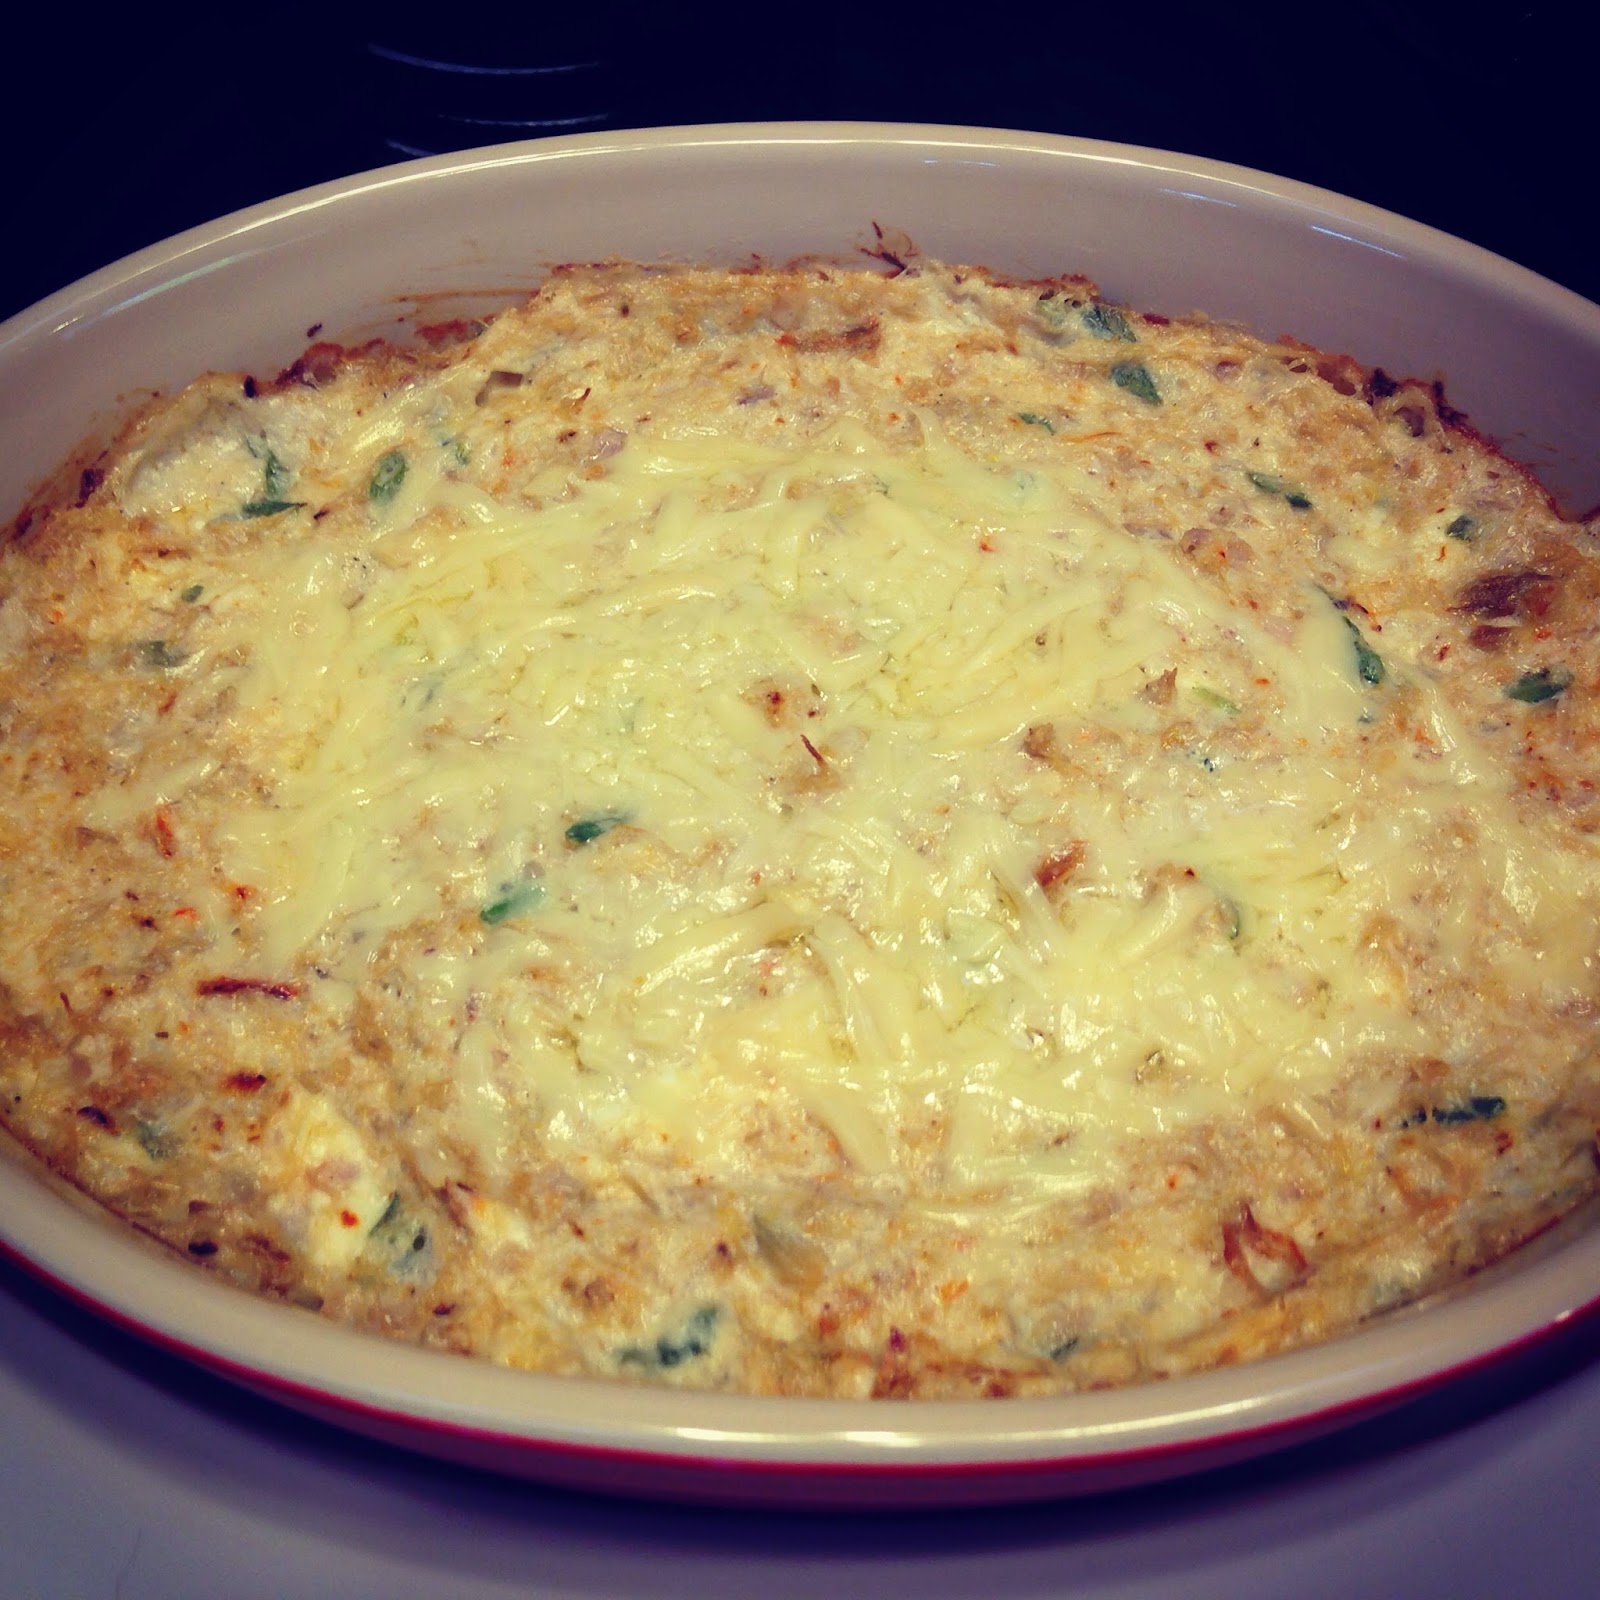
Recipe: Cathy's Crab Dip
Hello, hello, hello. I'm aware it's been quite a long time since I've updated this blog. What can I say? Life happened. However, I'm back today with this delicious recipe for you all.
One of the perks of your good friend being a food blogger is that she can recommend recipes for you to try. When I mentioned wanting to make a crab dip with the crab I had on hand, the culinary talent over at Insatiably Epicurious mentioned her BFF's recipe. Thirty minutes later, I had a recipe to play with. Thank you, Cathy, for allowing me to post this recipe with my tweeks (shown in italics)!
Ingredients
-11 oz cream cheese, softened
-1 small onion, minced (I used 1 medium shallot instead)
-5 tbsp mayonnaise
-12 oz of canned crab meat, drained and flaked
-1/8 tsp garlic powder (I used 6 garlics, minced)
-salt & pepper (I used sea salt and white pepper)-3 tbsp of lemon juice OR 1 tbsp lemon juice and zest from 1 lemon
-1/4 cup of grated parmesan cheese
-1/4 cup green onions, minced
-3 tbsp Worcestershire sauce
Directions
1. Preheat oven to 350.
2. Combine all ingredients in a medium mixing bowl. Let sit in the refrigerator for 30 minutes to allow the ingredients to "marry."
3. Transfer the dip into a casserole dish. Bake at 350 for 30 minutes.
(Cathy also likes to serve this dip in a sourdough round at times. To do so, bake in the casserole dish for 20 minutes, transfer the dip into a sourdough round, and then bake for another 10 minutes.)
Serve hot with crackers or toast points.
Bon appétit mes amis!
Tuesday, November 19, 2013
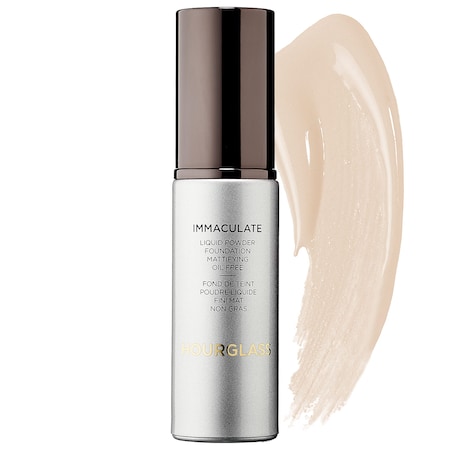
Review: Hourglass Immaculate Liquid Powder Foundation
I have been hearing so much about Hourglass cosmetics lately - from their primer to their Ambient Lighting Powder (the palette sold out within hours of the first day of Sephora's Giftobia event). These two products have been exploding in popularity due to how effective the primer is and how gorgeous and ethereal the Ambient Lighting Powder is on the skin. Their Immaculate Liquid Powder Foundation launched Spring of 2012 and has been on the receiving end of hundreds of glowing testimonials from consumers who rave how wonderful this foundation is for their oily, acne prone, and sensitive skin.
A quick look at their ingredients list and I was sold on trying. It doesn't contain any of the harmful ingredients I normally watch out for (read about that HERE).
Application
This foundation dries very quickly so I suggest you immediately buff it in the second you apply it to your face. I do not suggest dotting your face with it and THEN buffing it out. I dipped my Real Techniques Buffing Brush into a small amount and went to work buffing the product into my skin. It blends very easily and glides over the skin.
The Finish + Longevity
True to its word, this foundation dried to a matte powder finish. Impressive. I didn't need to reach for my setting powder. Formulated with cashmere kaolinite clay that functions as a super oil-absorber, this foundation sufficiently kept my oily t-zone area beautifully matte for a good 8 hours.
Coverage
This is a medium coverage foundation. I tried to apply another coat of the foundation to see if it would build but it doesn't seem like it can be buildable to full coverage. It still evened out my skin tone so it is a good medium coverage foundation. Because it dries to a powder finish, concealer needs to be applied over blemishes BEFORE use of this foundation. (Remember, once you apply powder to your face, you cannot go in with a cream product over the powder).
Packaging
Gorgeous packaging. The foundation is in a sleek glass pump bottle and really does scream "high end".
Price
OUCH! At $55 for 1 oz of product, this is definitely not a cheap purchase. I'd suggest getting a sample of this first to use for a while. If you can't live without it, go ahead and buy it. There definitely are cheaper alternatives out there (MUFE Matte Velvet Plus anyone?)
Sunday, November 10, 2013
Recipe: Sweet and Sour Beef Stew
With the weather cooling off, I was in the mood for a beef stew. While Viet Nam has its own version of beef stew, called Bo Kho, I was in the mood for a Western stew. A while back I made Chef Ellie Krieger's Sweet and Sour Brisket, and it was delish. I also remember the braising liquid being just as yummy. Anyone who knows me knows Chef Ellie Krieger is my go to chef for recipes - hers are healthy without sacrificing flavor. I adapted her recipe for sweet and sour brisket to make my stew, and it was surprisingly met with enthusiasm by hubby. So without further ado, here you go!
Special Equipment: Dutch Oven
Ingredients
2 lb beef flank, cut into 4 equal parts
1 medium onion, cut in half, then sliced into half moons
5 cloves garlic, minced
3 tbsp fish sauce
1 - 6 oz can of tomato paste
3 cups of shrimp stock
3 tbsp firmly packed brown sugar
1/3 cup cider vinegar
1/3 cup raisins
5 black peppercorns
2 allspice berries
1 lb of potatoes, peeled and quartered
Directions
1. Salt the beef flank. In a Dutch oven, heat 2 tbsp of vegetable oil and sear the flank until brown. Transfer the flank to a plate to let rest.
2. Add another tablespoon of vegetable oil and sweat the onions. Add the garlic and cook for a minute. Add 1 tbsp of fish sauce. Stir.
3. Add the 6 oz can of tomato paste, shrimp stock, brown sugar, vinegar, raisins, peppercorns, the remaining 2 tbsp of fish sauce, and allspice berries. Stir to combine and allow the stew to heat up to boil.
4. While stew comes to a boil, slice up the beef flank into one inch cubes. Add to the stew along with any juices that have accumulated.
5. Add the potatoes.
6. Once the stew comes to a boil, reduce to simmer. Cover the pot and let cook for an hour and a half.
Bon appetit!
Labels:
beef,
beef flank,
beef stew,
potatoes,
stew,
sweet and sour
Saturday, November 2, 2013
First Impression: Arbonne Products
DISCLAIMER: I was recently contacted to do a review of Arbonne products. Let me start by saying that this is NOT a sponsored post. I'm aware that many out there function under the belief that reviews like this are ALWAYS sponsored and thus are not 100% truthful. I cannot speak for other bloggers or beauty gurus out there. I CAN, however, tell you that while this may be true in certain situations, it is not true for me. I blog as a past time, a hobby, and as a stress relief from my career (which I will not disclose because a girl's gotta keep a few secrets here). I blog to share with you all what I've been enjoying on the makeup and skincare front so that we can benefit from one another. Rest assure my opinions are completely my own, affected by nothing other than my personal experience with a particular product.
PROS
In general, what I DO appreciate about this line is that the products are formulated without harmful ingredients such as mineral oil and parabens. This line boasts to be botanically based and hypoallergenic.
Many people are under the mistaken belief that because certain ingredients are natural, such as mineral oil and talc, they are safe. WRONG. Being "natural" doesn't preclude it from being harmful. The two are not mutually exclusive. In fact, while mineral oil (aka paraffinum liquidum) is natural, it has been linked to carcinogenic effects. I wrote a blog post a while back discussing the various ingredients I watch out for when trying a new product. It may be worth your while to read that post (click HERE) to understand why I'm such an obsessive monster when it comes to trying out new products. Believe it or not, after I educated myself about the various harmful ingredients cosmetic companies use, I went through a purge with my makeup and got rid of a ton of products.
Another pro to the line: the packaging. The packaging for every product is just beautiful. I like that they're mostly pump or squeeze bottles as this promotes good hygiene practice. Looking at the packaging, you expect quality high-end products.
As an animal lover, I also appreciate that this line is vegan certified, cruelty free, and free from animal testing. So let's see how these products actually performed...
Arbonne Makeup Primer
This primer looks and feels like the Smashbox primer. It's silky, a little goes a long way, and is fragrance free, which is great for those sensitive to smells. I used one pump, and it was enough to cover my entire face. While this primer lasts a good 6 hours, my nose was shiny after the 6 hour mark. I have normal to combination skin so it doesn't surprise me that my nose became shiny. However, the purpose of a primer is to keep makeup in place so those with oilier skin may have a bit of a problem with longevity. While this product isn't advertised as mattefying, it has a matte finish upon application and does not leave your skin oily. After a week's use, I was happy to see this product did not break me out.
SEA SOURCE MUD MASK
My first thought when I applied this to my face: THIS SMELLS GREAT! I'm not a fanatic when it comes to smells (scents don't usually bother me), but I loved how fresh this mask smelled during application. The smell indeed was a bit reminiscent of the sea. The mud mask is like any other charcoal mud mask in color: charcoal gray. It easily applied to my face like a cream. The tingling sensation was actually enjoyable and did not cause any pain or stinging. However, it's on the drying side. I have normal to combination skin, and it left even my oily areas (the t-zone) tight and dry. Even after I applied the RE9 Advanced Intensive Renewal Serum, my skin was still tight and dry. As for its effectiveness, unfortunately, it did not clear my blackheads as much as I was hoping and I still had small bumps on my forehead. While you should normally give new skincare products about 2 weeks to determine their effectiveness, I am especially harder to please when it comes to mud masks because of GlamGlow's Super Mud Clearing Treatment. I use GlamGlow's mud mask as the measuring stick for all mud masks out there simply because GlamGlow gives INSTANT results: blackheads are gone while skin is left feeling soft, supple, and hydrated. Hence, while this Sea Source Mud Mask was enjoyable given its smell and tingling sensation, I will still shell out $69 for GlamGlow's Mud Mask.
RE9 ADVANCED INTENSIVE RENEWAL SERUM
I applied this serum after using the Sea Source Mud Mask. It is lightweight and quickly absorbs into the skin. However, it isn't as hydrating as I prefer a serum to be. I was indifferent to serums until I began using Caudalie's Vinoperfect Radiance Serum a month ago. Even after I've scrubbed my face with a scrub, cleansed it with my Clarisonic, used an exfoliating mask, Caudalie's Vinoperfect Serum was so hydrating, despite being lightweight, that it can also double function as a moisturizer.
INTELLIGENCE NOT-SO-BASIC REJUVENATING CREAM
This cream was THE answer to my complaint that the Sea Source Mud Mask was over-drying and the serum not being adequately hydrating. This rejuvenating cream was like a spa in a jar! This thick and creamy moisturizer was oh so luxurious that it was a complete treat to use. My skin was greedily drinking up the moisture this cream provides. It did not leave my skin greasy, but it does leave your skin sticky for about an hour after application. This sticky feeling, however, doesn't bother me at all. The next morning, my skin was soft, supple, and hydrated. I'm even more impressed with this product because of the fact that it restored the hydration I lost from the mud mask...and then some. I know this is a night cream but I can almost see this doubling as a primer for those with dry skin. Getting multiple use out of a product is always a huge plus!
RE9 Eye Cream
As far as eye creams go, I prefer mine thicker for the night time and lightweight for the day time. I'd classify this eye cream as a thicker one. Like the Rejuvenating Cream, it's thick, creamy, and luxurious upon application. While I can't speak to whether or not it helps reduce dark circles (since this is merely a first impression review and I don't really have bad dark circles to be able to notice) and whether it minimizes wrinkles (I've been blessed so far with a youthful appearance despite my whopping early thirties), I CAN speak to the fact that it does feel hydrating. By the next morning, my orbital area still feels supple, soft, and hydrated. Caffeine is one of the listed ingredients in this so while it isn't advertised as having an instant brightener, the caffeine will help make you look less tired pretty quickly. While this eye cream IS on the thicker side, it's not so thick that my under eye concealer slips and is unable to stay put underneath my eyes. Thus, you can definitely use this as your daytime eye cream. Take caution, though, my oily monsters. Depending on how oily you are, you may or may not want to use this during the daytime. What I absolutely love about this eye cream is that after 7 ingredients, you see 15 plant based extracts listed in the ingredients list. HELLO!! LOVE!
RE9 Smoothing Facial Cleanser
I applied one pump of this onto my Clarisonic and let the Clarisonic do its magic. While it does feel smooth even as I rinsed it off my face, my skin was left feeling very dry and tight. I initially used this cleanser after I used the mask so I used it again the next morning after my face was hydrated with the rejuvenating cream. Unfortunately, it still left my skin tight and dry. Given that the rejuvenating night cream restored moisture into my skin after the drying effects of the mud mask, I'd say this cleanser is the reason for the tight dry feeling on my skin. I definitely don't recommend this for people with dry skin despite the fact that this cleanser is advertised for all skin types. The good news about this cleanser is that it does not contain SLS, an irritant. (Read more about the use of sulfates and their adverse effects HERE) I found this to be surprising since the cleanser lathers up quite well without the presence of SLS. If you have oily skin, this cleanser may be the one for you.
FC5 Exfoliating New Cell Scrub
A cream formula with tiny granules that you can use on a daily basis, this scrub is advertised to be infused with antioxidants that help restore and rejuvenate the skin to yield a more youthful appearance. I like that there are numerous fruit oils (bergamot, mandarin orange, sandalwood, lime, orange, to name a few) in this scrub thus keeping to the product's promise of being infused with plenty of antioxidants and being botanically based. The creamy texture feels very nice on the skin. The product warns of possible feelings of tingling in the skin that may last up to 2 hours. However, I didn't experience this at all. It was quite pleasant to use. I skipped using a cleanser after this scrub to see how well it cleansed my skin. The cotton pad I used to apply the RE9 Advanced Regenerating Toner was pretty clean. Thumbs up for effectiveness! However, while this product was certainly effective in removing the grime, dirt, and dead skin cells on my face, thus leaving it squeaky clean, it did leave my face a bit dry. It didn't leave my face as dry as the cleanser but compared to other scrubs I've used, this definitely isn't as hydrating. Those with oily skin may very well love this scrub and may, in fact, be able to use this everyday. Those with normal skin may wish to use this about 3 times a week. I'd recommend those with dry skin to use this more sparingly.
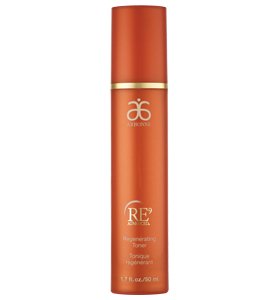
RE9 Advanced Regenerating Toner
I really like the citrus scent of this toner. The scent is great to wake you up in the morning. While this is advertised to be used as a mist, I apply all toners with a cotton round. Because I was only able to run a test drive with this product for about a week, I cannot speak to whether or not it truly does help with the turnover of skin cells. If you want a toner rich in anti-oxidants, Vitamin A (great for blemish prone skin), Vitamin C (natural skin brightener and collagen promoter), and Vitamin E (fights free radicals in your skin thus great for anti-aging), you should definitely give this a try.
RE9 Advanced Restorative Day Creme SPF 20
In general, I like the moisturizers in this skincare line. The day creme is no different. Hydrating but doesn't leave your skin oily, this moisturizer has the added benefit of SPF 20 protection. I can always use some SPF protection since some of my foundations do not contain SPF. However, while this is a good day cream, I'd caution use of this day cream if you are the subject of flash photography. I find that products with SPF higher than 15 tend to give a flashback (the white cast you see on your face in photos).
Overall, this is a solid skin care line. You will need to test out the various products in order to best find the ones that suit your skin. The Arbonne consultant will be able to help you pick and choose the products that will best suit your skin.
CONS
This line is not readily accessible at places such as Sephora, Ulta, and or even the drug store. I like knowing that when I run out of one of my beloved skin products, I can just jump into the car and head to my nearest Ulta or Sephora to stock up. The flip side to this is that you make contact with the Arbonne consultant who WANTS to give you face time to explain each products in further details.
I was not provided with the products in their original boxed packaging. Thus, I do not know whether or not the ingredients are listed on the outside packaging (they aren't listed on the actual products themselves). I would assume so as that is FDA required. If you are an ingredients fanatic like me, you will be frustrated in your efforts locating an ingredients list online. While some consumers are bothered about this, cosmetic companies aren't required to publish ingredients online. They are only required to do so on the packaging. However, not having ingredient information readily accessible may prevent some consumers from even giving this skin care line a try.
The Arbonne consultant I dealt with, Lori, was more than happy to give me the ingredients list for each product when I requested.
Website: Lorimyers.myarbonne.com
Email: LoriAMyers@me.com
Facebook page : Arbonne Lori Myers Independent Consultant
Saturday, October 26, 2013
Makeup for Nicole: Sexy Vampire
Ok so I've been a little remiss about posting Halloween makeup tutorials. I may be the only person out there who isn't into Halloween...but after doing Nicole's makeup, well, I may now be a convert. Unfortunately by the time I finished her makeup, the sun had gone down and these were the best photos I was able to take of her "after" poses.
Aren't those contacts amazing?
I kid you not, those fangs were homemade by her SO
Makeup used:
Face (one shade lighter than her skin color since vampires are suppose to be pale)
MAC Studio Fix in C2
MAC Select Cover Up in NW20
No setting powder was used
Urban Decay All Nighter Makeup Setting Spray
Eyes
MAC e/s in Soft Brown
MAC e/s in Cranberry
Urban Decay 24/7 Glide-On Eye Pencil in Zero
Lorac Pro Palette e/s in Black
Lorac Pro Palette e/s in White
Lorac Pro Palette e/s in Garnet
False Lashes
Model 21
Cheeks
MAC e/s in Mystery
MAC e/s in Wedge mixed with Soft Brown
Lips
MAC - Dubonnet
Urban Decay 24/7 Glide-On Eye Pencil in Zero (outer corners)
Cailyn Tinted Lip Balm in Big Apple
Subscribe to:
Posts (Atom)