Sunday, April 28, 2013

BB Creams - Overview and Review

History
Started in the 1960's by a German dermatologist and later introduced in Japan and Korea in the 1980's, BB cream is one of the latest cosmetic rages.  BB stands for Beauty Balm, Blemish Balm, Beblesh Balm or Blemish Base (the Koreans apparently have a trademark on "blemish balm").  In Germany, it was used on patients post skin surgery to help soothe and regenerate the skin.

Asian v. Western BB Creams
In Asia, BB Cream is first and foremost a skin care product with cosmetic properties.  It is a 5 in one product: moisturizer, primer, serum, foundation, and sunblock.  Asian BB creams are also usually formulated to include skin-whitening properties as flawless glowing porcelain skin is highly prized in Asia.  Most Asian BB creams are limited in the number of shades available to match your skin - the reason being Asian BB creams are formulated to oxidize to match the user's skin.  This is why I don't concern myself with the grayish tint/cast of the cream itself as it later oxidizes to match my skin tone.

Western brands of BB creams tend to function as a cosmetic product with skin care properties (opposite of Asian bb creams).  A few brands I've taken note of due to their healthier ingredients are Smashbox's Camera Ready, Boscia, and Tarte.

Multi Purpose
This all-in-one product can be used alone like a tinted moisturizer or as a base for foundation.  To increase its staying power, apply powder to set the cream.

Verdict


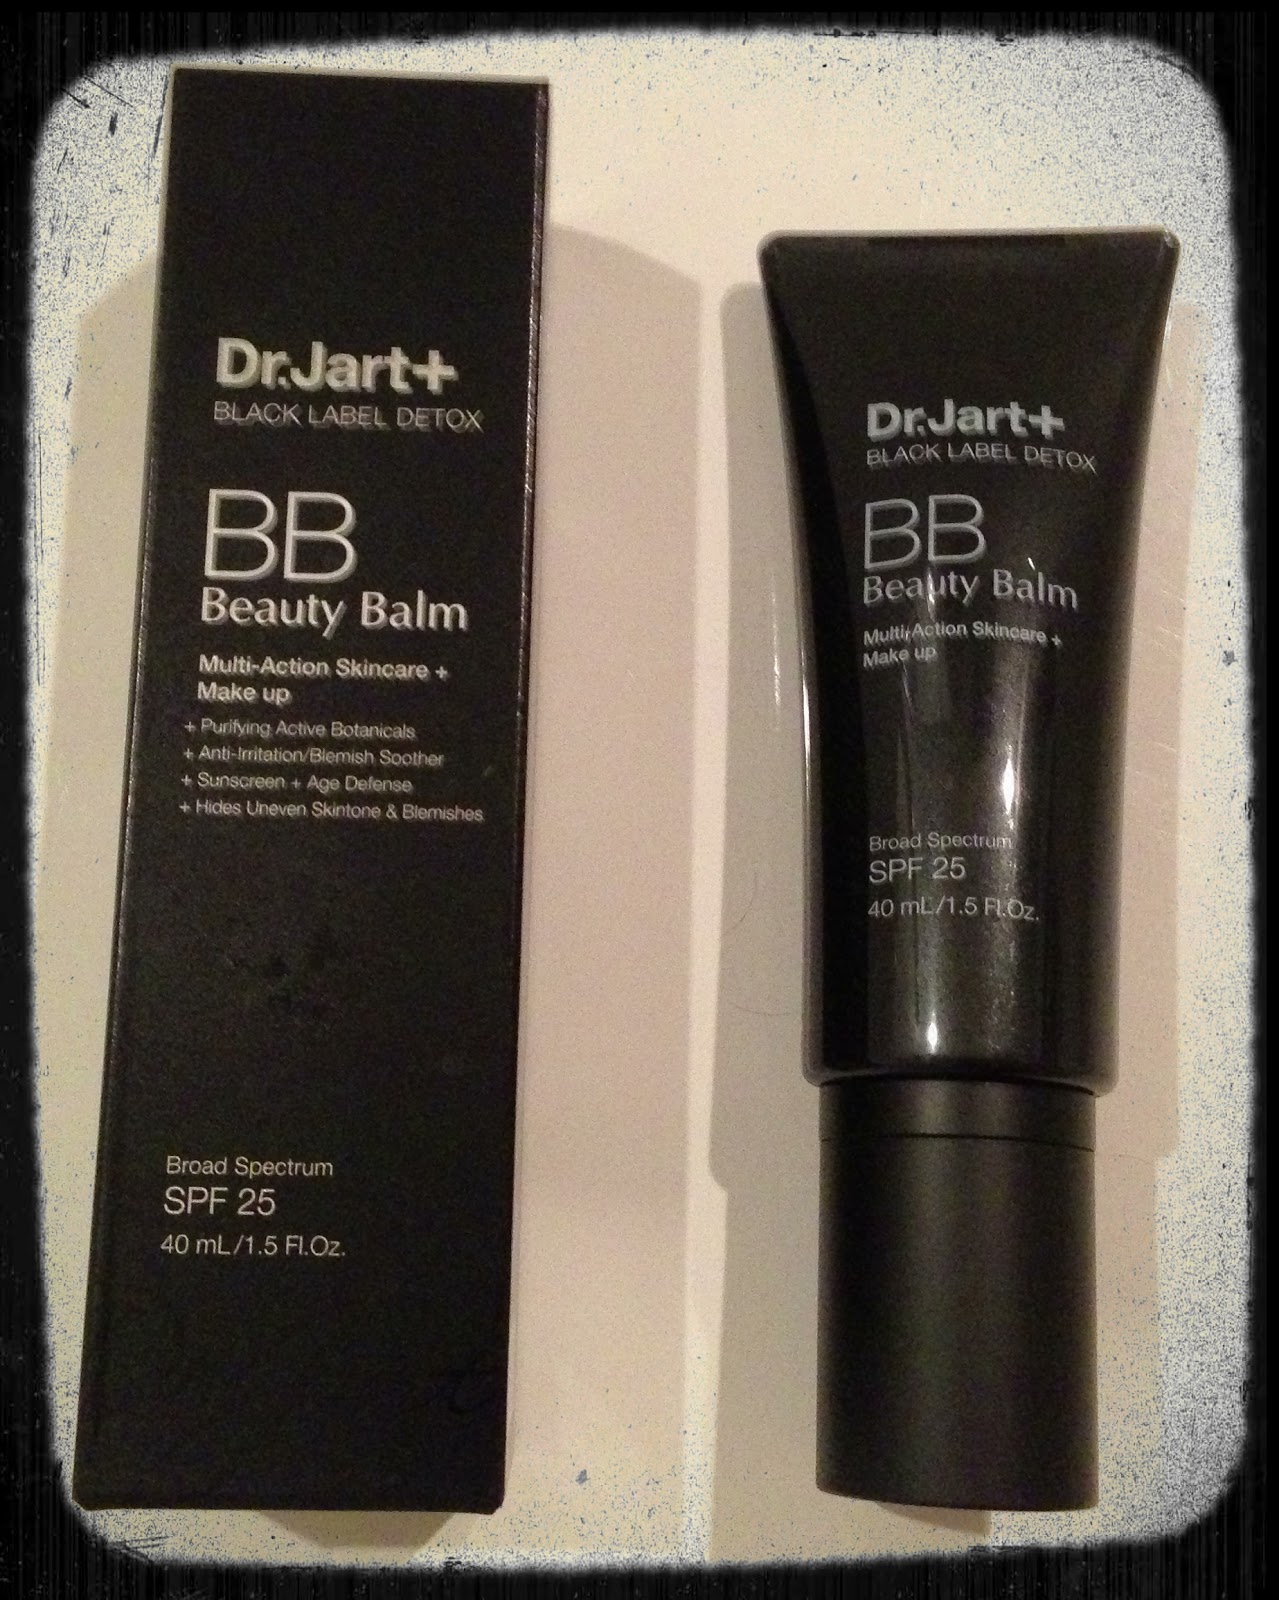
I tested a lot of BB creams, both Western and Asian brands.  I enjoyed using Dr. Jart's Black Label Detox BB Beauty Balm the instant I applied it to my skin.  I found this BB cream to have the most coverage out of all the BB Creams I tried.  I stippled extra product onto my problem skin areas to conceal my blemishes.  Unlike the Missha and Skin79 BB creams, Dr Jart's BB cream does not have a grey tint or cast that requires oxidation.  However, because this BB cream comes in only one color, it isn't ideal for darker skin tones.  I am one who always has to set my foundation with powder (the joys of having combination skin!).  However, I would be ok with just applying this BB cream without setting it with a powder.

As for the skin benefits, I noticed a difference in my pores once the BB cream set:  my pores shrank, my skin tone evened out, my skin appeared "brighter", and the formula had a satin finish.  It was hydrating (the only skin product I used prior to applying this cream was toner) without leaving my skin greasy.

This product definitely functions as a BB cream should: provide skin benefits with some cosmetic properties.  I was surprised to learn that Dr. Jart, despite its name, is actually a Korean bb cream.

Coming in second to Dr. Jart's Black Label Detox BB cream is Missha.  I'd wear Missha alone and set with a powder.  Skin79 is another popular line of BB creams.  I may be the odd man out but I was unimpressed with this line's staying power (and I tried the pink, gold, and diamond lines).  However, the Skin79 BB creams functioned fantastically as a primer and kept my foundation beautifully matte and long lasting.


Missha BB Cream in #23


Skin 79 BB Cream line

I was most disappointed with Smashbox's Camera Ready BB Cream.  While the line boasts of a range of colors to suit all skin tones out there, it really just functioned as a tinted moisturizer with some skin benefits.  This alone wouldn't be a problem BUT the point is to function as a bb cream.  When using that standard, Smashbox falls short.  It also couldn't match the staying power of Dr. Jart and Missha.

With all of that said, I'd like to issue a disclaimer: my reviews are based upon how these products worked for ME.  Obviously, everybody is different.  Plenty of my friends adore and love the Skin79 bb creams.  Smashbox's BB cream is also highly rated and raved by other makeup artists.  It all depends on what you want from a BB cream - do you prefer one with skin benefits over cosmetic benefits or vice versa?  Also, the BB creams themselves may also be inherently limiting for users - some only come in one color, which excludes a number of skin tones.  The point of this post is to just give you a bit of insight and overview of BB creams so that you are armed with information to use to select the best bb cream for you.

Which BB Cream(s) have you tried and which BB Cream is your holy grail?

Wednesday, April 24, 2013

Recipe: Vietnamese Chicken Pho - Pho Ga


Lighter in flavor than its beef counterpart but no less lacking in flavor, chicken pho is not given its fair amount of lime light.  I was bribed into giving chicken pho a fair shake when my mom introduced me to young chicken egg.  I love all things related to eggs.  When I was promised several young chicken eggs and nuoc mam to dip my chicken, my interest was piqued..  After I tasted nuoc mam dipped chicken paired with the young eggs and delicate broth my mom spent hours to make, I was sold.  This dish is still as comforting to me as beef pho.

What does young chicken egg look like?


This recipe is memorialized from memory and lack of measuring tools so my apologies in advance for any confusion.

Equipment
12 qt stock pot

Broth
3 yellow onions UNPEELED
2 knob of ginger, UNPEELED
1 daikon
15 star anise, toasted
3 cinnamon sticks, toasted
2 tbsp fennel seeds, toasted
2 tbsp coriander seeds, toasted
2 cardamom pods, toasted
10 cloves, toasted
1 cup fish sauce
2 chunks of yellow rock sugar
2 lbs of chicken (I've found using a fryer chicken yields a gorgeous yellow broth that is quite flavorful but this is personal preference)
Any chicken bones you may have in the freezer, toss 'em in!

Place star anise, fennel seeds, coriander seeds, cardamom pods, and cloves into a cheese cloth after they have been toasted.

1. Turn on oven broiler.  Half the onions and ginger.  Place onions and ginger onto a cookie sheet and slide sheet under broiler.  (The purpose of halving them is so that they don't roll around under the broiler).  Broil for 15 minutes, making sure the onion and ginger becomes charred.  After 15 minutes, remove with tongs and rinse onion and ginger under warm running water.  Rub off the charred skin.  Trim and discard the blackened root and stem ends.  Peel ginger skin.  Make sure all blackened spots are cleaned off.  Bruise the charred ginger lightly with broad side of a knife.  Set onion and ginger aside.

2. Parboil the chicken to release the impurities.  Drain the chicken and wash each to thoroughly remove any impurities still clinging to the chicken.  Clean the stock pot as well.

3. Return chicken and chicken bones back to clean stock pot.  Add the daikon, the cheese cloth of spices, rock sugar, fish sauce, the charred onions and ginger.  Fill the pot with water.  Simmer, uncovered, for 3 hours at a minimum.  

4.  Taste to ensure the broth is seasoned to desire.  Remove all solids and strain the broth.  Allow the broth to cool over night.  A layer of fat will condense.  Remove the fat.

(Note: I used my Le Creuset Dutch Oven to make the broth.  After 3 hours, I turned off the heat and put the lid on and left it like that until it completely cooled.)

Assembly: (simmer broth while you are assembling the bowls)
pho noodles
shredded chicken (I recently discovered that I LOVE using rotisserie chicken meat)
1 yellow onion, sliced paper thin, soaked in cold water
3 or 4 scallions, thinly sliced (I prefer to slice them diagonally because it's more aesthetically pleasing to me)
young chicken eggs
pepper (I prefer white pepper)
Nuoc mam (Vietnamese dipping sauce) - optional

1. Boil pot of water.  Put pho noodles in for about 5 seconds using a strainer, swirling noodles entire time to prevent clinging.  Alternatively, place pho noodles into a strainer that will fit in your pot of boiling water and submerge.  Remove the noodles and make sure water is drained before placing into a big bowl.

2. Top each bowl of noodles with the shredded chicken and young chicken eggs.  Place a mound of yellow onion in the center and garnish diced scallions on top.  Finish with a sprinkle of pepper.

4. Increase the heat of the broth and bring to a ROLLING boil.  Ladle broth into each bowl.Serve immediately.

Alternatively, the chicken can be served on a separate dish alongside the young chicken eggs.  You have the option of dipping the chicken with nuoc mam.  If you're feeling adventurous, you can also add giblets and intestines.

Garnish with Thai basil, culantro, bean sprouts, Thai or Serrano chiles (thinly sliced), hoisin sauce, and or sriracha sauce.  Squeeze lime juice.

Click HERE for my oxtail pho recipe!

Bon appetit mes amis!

Sunday, April 21, 2013

Battle of the Neutral Palettes


I had been working on a post to review the Naked 1 and Naked 2 Palettes from Urban Decay.  However, I was never able to complete the blog post because I just can't make up my mind which palette is better.  I realize I should review these palettes separately and judge them standing alone, but, in the back of my mind, I was determined to choose ONE neutral palette as a go to.  

My ideal neutral palette would have the following Essential Shadows (as I call it): a matte black eyeshadow, a matte warm brown eyeshadow for blending purposes, and a light colored matte (or very little shimmer) eyeshadow for purposes of highlighting.  Matte black and matte warm brown are essential for every look I create.  I use black to line my eyes, buff out my black eyeliner, and to define my outer crease.  I also use warm brown eye shadows to blend, blend, blend, and blend some more.  

I do NOT like using solely shimmery eyeshadows.  Shimmery shadows are very reflective of light and they tend to pronounce the signs of aging by drawing attention to wrinkles.  If the entire eye look consists of shimmery shadows, the colors tend to look like they blend together.  I prefer more of a contrast that requires the mixing of matte and shimmery shades.

Onto the Naked 1 and Naked 2 palettes: both of these palettes have one or two of my Essential Shadows but not all.


Naked 1 - top swatch
  • Pro: has 2 blending shadows - Naked (3rd from left) and Buck (5th from left)
  • Con: does not have a matte black shadow.  Instead, has a shimmery black shadow, Creep (2nd from right)
  • Con: does not have a matte to minimally shimmery highlight shade.  Instead, has a VERY shimmery highlight shade, Virgin (far left)

Naked 2 - bottom swatch
  • Pro: has a matte black shadow, Blackout (far right)
  • Pro: has a matte highlight shade, Foxy (1st left)
  • Con: does not have a warm brown eyeshadow for purposes of blending.  Instead, it has a cool brown shade, Tease (5th from left).  Tease has a more taupe color to it.  This may not be a problem for some, but I prefer warm brown.  Based on my personal experience, warm browns are more universal for blending.
Let's say I was packing to go on vacation.  If I were forced to bring just the Naked 1 palette, I'd bring along a matte black shadow, such as Carbon from MAC, and skip highlighting.  If I were forced to bring Naked 2, I'd include a matte warm brown shadow such as Soft Brown from MAC.  

What to do??

Enter Lorac's Pro Palette:


In the words of Carrie Bradshaw: "Hello, Lover!"

This palette has ALL of my Essential Shadows: matte black (Black), matte warm brown (Taupe and Sable), matte highlighter (White and Cream), and minimally shimmery highlighter (Nude and Champagne).

What I also love is that the shadows are organized into two categories: matte on top and shimmery on bottom.  These colors are mostly neutral but if one desires more variety in color, there's Garnet, Deep Purple, and Slate to play with.  The shadows have great color pay off even though they can be a bit powdery.  

So, if I were to choose ONE neutral palette, I'd choose Lorac's Pro Palette.  At $42 for 16 shadows,  ~$2.63 per shadow, this is a great value palette compared to $50 for 12 colors in both Naked palettes making it ~$4.17 per shadow.

Which palette would you choose?

Wednesday, April 17, 2013

Makeup for Katie - Daytime Look


Katie wanted her makeup done for a daytime birthday event.  The look achieved: Neutral eyes with bright lips.

Face
Dr Jart's Black Label Detox BB Beauty Balm
Coastal Scents Eclipse Concealer
**No powder was used - the BB cream set beautifully on Katie's skin, which is combination skin. 

Eyes
MAC paint pot in Painterly
MAC e/s in Soft Brown
MAC e/s in Wedge
MAC e/s in Woodwinked
Urban Decay Naked Palette 2 - e/s in Busted
Urban Decay Naked Palette 2 / Naked Basics Palette - e/s in Blackout
Urban Decay Naked Palette 2 / Naked Basics Palette - e/s in Foxy
MAC fluidline in Blacktracks
Maybelline Volume Mascara in Black Black

I left her eyebrows alone believe it or not!

Cheeks
Benefit - Hoola as contour
Nars - Orgasm blush

Lips
OCC's Lip Tar in Pretty Boy

Saturday, April 13, 2013

Limited Edition Duo Fibre Collection by Real Techniques now available at Ulta!


Ulta is now selling the Limited Edition Duo Fibre Collection.  These will only be available for a year!  Get yours quickly!  $19.99 at Ulta or from the Real Techniques website.

Samantha Chapman on these brushes: "It's always easier to add than remove makeup.  That is what makes these brushes so great - you can create sheer layers until the desired look is achieved."

Friday, April 12, 2013

Sephora Chic Week Haul


It's Chic Week at Sephora!  Get a 15% discount by entering code: Chic during check out!

Pictured above is my loot:
1. Benefit's How to Look the Best at Everything Makeup Kit in Medium.  Includes:
    a) the famous POREfessional
    b) Hello Flawless Oxygen Wow foundation
    c) Boi-ing Heavy Duty Concealer
    d) Hello Flawless pressed powder

2. Obsessive Compulsive Cosmetic's Pro's Pick Lip Tar Set v2.0

3. Yves Saint Laurent Touche Eclat in 1.5 (luminizing pen)

4. Dr Jart's Black Label Detox BB Beauty Balm

5. Lorac's Pro Palette

6. First Aid Beauty Ultra Repair Cream


What have you bought or are planning to buy?

Thursday, April 11, 2013

Drugstore Product Review: Revlon Color Burst Lip Butter


Ever since I threw 4 of these lipsticks into my basket at Target, I've been reaching for them more frequently than the lipsticks I usually wear everyday (MAC or Lancome).  They're advertised as "a buttery balm with beautiful shiny color to give you baby soft, healthy glowing lips."  Apparently, "94% of women felt lips were softer, smoother, and instantly hydrated" due to the following ingredients: hydrating mango, shea and coconut butter, which boosts lip moisture by 156%.  Also advertised to provide "super charged hydration" and to glide on lips "buttery smooth."  Color me intrigued.

Pigmented, creamy, and hydrating - I was pleasantly surprised.  These lipsticks lived up to their name in that they literally glide onto your lips like butter.  The downside, though, is that they do not last long.  I have to reapply this lip product twice as often as my high end lipsticks.

The first color I tried was Berry Smoothie.  After lining and filling my lips with Revlon's lip liner in Plum, I applied a coat of Berry Smoothie.  Thanks to the fact that I colored my lips with a lip liner first (it helps your lipstick stay longer), I still had the lip liner color on my lips about 3.5 hours later.  However, the lip butter wore off by then, requiring me to apply a new coat.

For the more nude shades like Creme Brulee, use a lip primer (such as MAC's Lip Erase), or fill in your lips with a nude lip liner first so that the color will apply true to its color on your lips.

My favorite every day neutral color to wear from this line is Brown Sugar - it's very close to being a dupe of my Lancome's Rouge in Love line in the color Lasting Kiss.  Between $6-8 (depending on the retailer), Revlon's Lip Butter is definitely more affordable than my $26 Lancome counterpart.  So if you're looking for something affordable to wear and don't mind the constant re-application, give these lip butters a try!

Monday, April 8, 2013

Recipe: Vietnamese Grilled Pork and Vermicelli - Bun Thit Nuong


Ingredients
3 lbs of pork butt or pork shoulder, sliced into 1/4 inch thick and 3 inches long
4 - 5 stalks of lemongrass, minced
3 shallots, minced
5 cloves of garlic, minced (adjust to taste)
2 tbsp of honey (my mom swears by honey in marinade)
3 tbsp of fish sauce (I prefer Megachef, the blue bottle)
4 tbsp of sugar
2 tbsp of sesame oil
1 tsp of pepper (I prefer white pepper)
1 tbsp of caramel sauce (nuoc mau)

1 package of vermicelli noodles.  I like to use the following brand:

Herbs
Tia to (red perilla leaves)
Hung lui (mint leaves)
Bean sprouts
Lettuce

Garnish
Cucumbers, diced into matchsticks
Pickled carrots
Pickled daikon
Roasted peanuts
Scallion oil
Fried shallots
Nuoc cham (dipping fish sauce)

1. Combine lemongrass, shallots, garlic, honey, fish sauce, sugar, sesame oil, pepper, and caramel sauce.  Marinate the pork over night (at the least 2 hours)


2. Traditionally, pork is grilled using a grill basket, which can be purchased at Chinese and Vietnamese markets.  However, if you don't have one, you can: grill indoors on a cast iron grill, place the pork under the oven broiler until cooked/charred, or cook the pork in a pan.  These indoor methods just won't yield the same smokey charred taste as the traditional outdoor grill method.

3.  Cook the vermicelli noodles according to the directions on the packaging.  Drain the noodles and let them dry completely!  It should be dry and on the sticky side.

4. In a bowl, place sliced up lettuce leaves, herbs, and bean sprouts.


5.  Put the vermicelli noodles on top of the vegetables.  Top the noodles with the pork.  Garnish with the pickled carrots, daikon, and cucumbers.  Drizzle the scallion oil over the garnish.  Garnish the scallion oil with the fried shallots (this dish is all about layers).  Finally, drizzle nuoc cham over the entire bowl to your desire.

Bon appetit!

Friday, April 5, 2013

Date Night Makeup using Urban Decay's Naked Basics Palette

Happy Friday all! Here's a look created using Urban Decay's Naked Basics Palette.  Great for heading out with the gals or for a date tonight!  


Face
BB Cream No. 23
Make Up For Ever Matte Velvet Plus #40
MAC Select Cover Up in NW20

Cheeks
Tarte Amazonian 12 Hour Amazonian Clay Blush in Dollface
Tarte Matte Waterproof Bronzer in Park Avenue Princess

Eyes: Urban Decay's Naked Basics Palette
1. Naked 2 - all over lid and crease color
2. Foxy & W.O.S mixed together - lid color
3. Faint - crease color
4. Crave - outer corner emphasis
5. Venus - inner corner and brow highlight

Stila Stay All Day Waterproof Liquid Eye Liner in Jet Black

Aqua Brow #25

Lips
MAC lipliner in Subculture
MAC lipstick in Pink Plaid
MAC lip gloss in Right Image

For my review of the Naked Basics Palette, click HERE

Tuesday, April 2, 2013

Featured Recipe: Dark Fudge Apricot Brownie with Coconut Vanilla Whipped Cream & Hazelnuts


In October of 2012, I had the fortune of accompanying the culinary talent over at Insatiably Epicurious to an open call for Master Chef.  For those unfamiliar with the show, home cooks compete through a series of elimination rounds in hopes of the ultimate goal of becoming Master Chef.  They are mentored and judged by three power houses in the culinary world: the legendary Chef Gordon Ramsay, winemaker and restauranteur of some of the most celebrated Italian restaurants in the country Joe Bastianich, and Graham Elliot, the mastermind behind the first "bistronomic" restaurant in Chicago.

Needless to say, I was inordinately excited to accompany my friend for moral support.  Ok, so I was also hoping for a glimpse of Gordon, Joe, and Graham but that was a secondary priority.  Anyway, I was fascinated by the hundreds of home cooks, their culinary creations, their presentations, and their personalities.  Some came prepared with practically a mini kitchen for the casting call!

My friend from Insatiably Epicurious, however, is the epitome of "more than meets the eye."  As soft spoken as she is, as unassuming as her persona and the way she disclosed she merely baked a brownie for this casting call to other contestants, Top Chef alum Jamie Lauren raved (after emphasizing that brownies are her thing) "THAT is a damn good brownie" after but one bite of my friend's Dark Fudge Apricot Brownie with Coconut Vanilla Whipped Cream & Toasted Hazelnuts.  Thereafter, the remainder of the entire judging panel literally surrounded her station to get a bite of the brownie.  Jamie Lauren even came back for seconds.

So without further ado, I present:

Dark Fudge Apricot Brownie with Coconut Vanilla Whipped Cream & Toasted Hazelnuts
by Insatiably Epicurious


Special  equipment:
double boiler or large metal bowl over pot of boiling water
electric mixer
sifter
8x8x2 baking pan
Parchment paper
Whip Cream Dispenser
Biscuit cutter (optional)


Glaze Ingredients
18 oz Smuckers Apricot Preserves
1 tbsp orange gelatin powder
¼ cup water

Glaze Directions:
In a small sauce pan, bring water slowly to boil, add gelatin, and mix thoroughly.
Pour contents of preserves into dissolved gelatin and mix.
Bring to a boil for 2 minutes and remove from stove. Strain liquid and preserves. Set aside separately.


Coconut Vanilla Whipped Cream Ingredients
14oz coconut cream
1 vanilla bean
1 ½ cup heavy cream

Whipped Cream Directions

1. Slice open vanilla bean. Use a knife to scrap the inside of vanilla bean. 
2. Place vanilla scrapings, heavy cream, and coconut cream into medium bowl. Whisk gently to 
combine. 
3. Add contents into dispenser. Chill for at least 1hr.
4. Shake thoroughly right before use.


Brownie Ingredients
2 sticks unsalted sweet butter
9 oz Ghiradelli 60% bittersweet chocolate
1 cup cake flour
1 cup & 6 tbsp granulated sugar
2 large eggs
1 tsp baking powder
1 cup chopped hazelnuts- toasted
¼ tsp salt


Brownie Directions

1. Preheat the oven to 350 degrees. 
2. Cut 2 lengths of parchment paper to line bottom and sides of baking dish, across and down. Fold 
down parchment paper along the sides of the baking dish and set aside.
3. Set a pot of water to boil. Reduce to medium heat. Place a large metal bowl over boiling water. Place 
chocolate and butter into bowl. As contents begin to melt, use a small whisk to mix contents 
thoroughly.
4. Set bowl of chocolate mixture onto a flat surface. Put a lightly damp folded towel under the bowl to 
keep it steady. Set aside to cool until lukewarm.
5. In a separate bowl, use mixer to beat sugar and eggs until well blended.
6. Blend in chocolate mixture into eggs.
7. Sift cake flour, baking powder, and salt into mixture. Fold to blend.
8. Pour 2/3 of brownie mixture into pan. Tap bottom of pan against hard surface to even out.
9. Evenly distribute apricot preserves over surface of brownie mixture.
10. Pour in remaining brownie mixture to evenly top surface. Tap again.
11. Bake for 45-50min. Remove from oven and cool for at least 30min.
12. To serve, use a biscuit cutter to cut a perfect circle into brownie. Lift carefully and place onto 
serving plate. Add whipped cream to surround brownie. Top generously with toasted hazelnuts. Using 
a spoon, drizzle apricot glaze onto brownie and a bit over whipped cream.
13. Serve immediately.


Head on over to her blog for more delicious recipes!

Bon appétit mes amis!